CI Cards - Agent Level
CI level cards will allow each agent in the office to create their own CI cards, be billed individually and only send the cards to their own contacts flagged as CI's.
To setup Agent level cards follow these steps.
-
Log into the OMS as the Admin user. (If you are not the Admin user, please contact your office Broker and have them complete the steps 1-3)
-
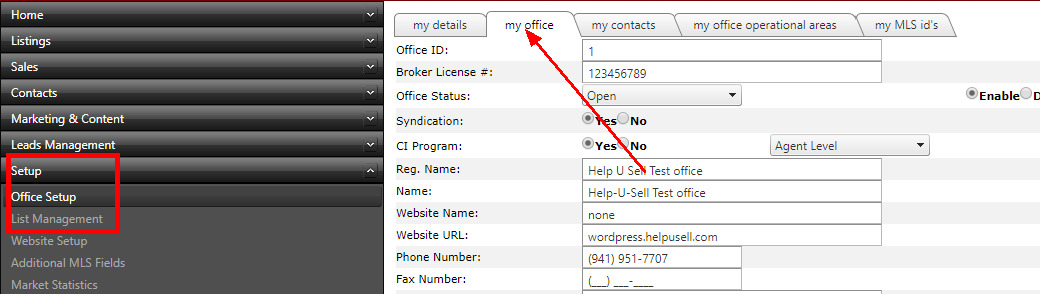
Under 'Setup' select 'Office Setup' and then select the tab on the top labeled 'My Office'
-
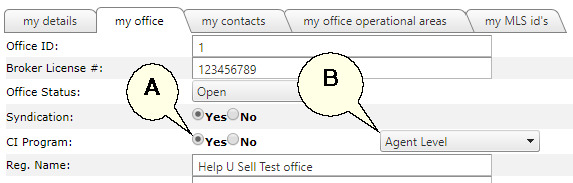
Next opt in for the CI Program by selecting 'Yes' (A) and then 'Agent Level' (B) from the drop down to the right.
The Following Steps are followed by each agent who wants to participate in the Agent Level CI Program.
-
Log into the OMS and go to 'Setup' then 'Office Setup'
-
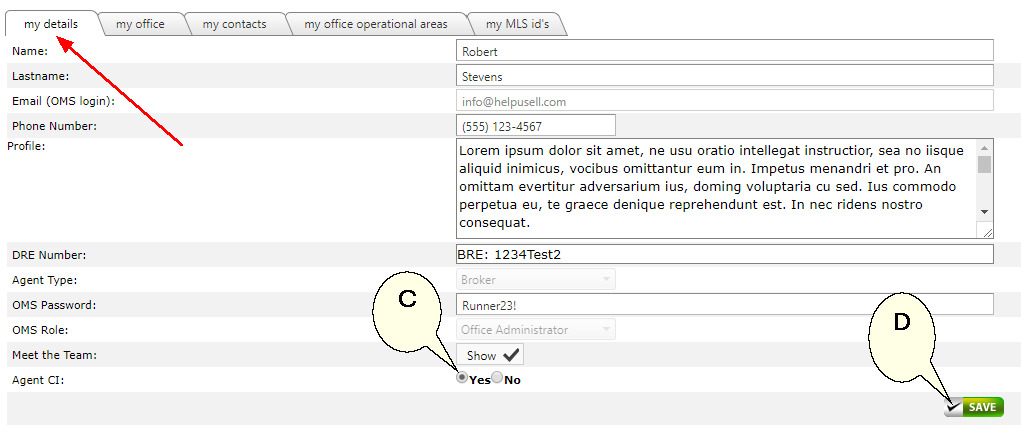
The default screen will be on the 'My Details' tab, scroll to the bottom and select 'Yes' for 'Agent CI' (C). You can opt out of the cards anytime by changing this to 'No'. This will only opt out the agent from the program.
-
Save your profile (D).
Customizing your cards
-
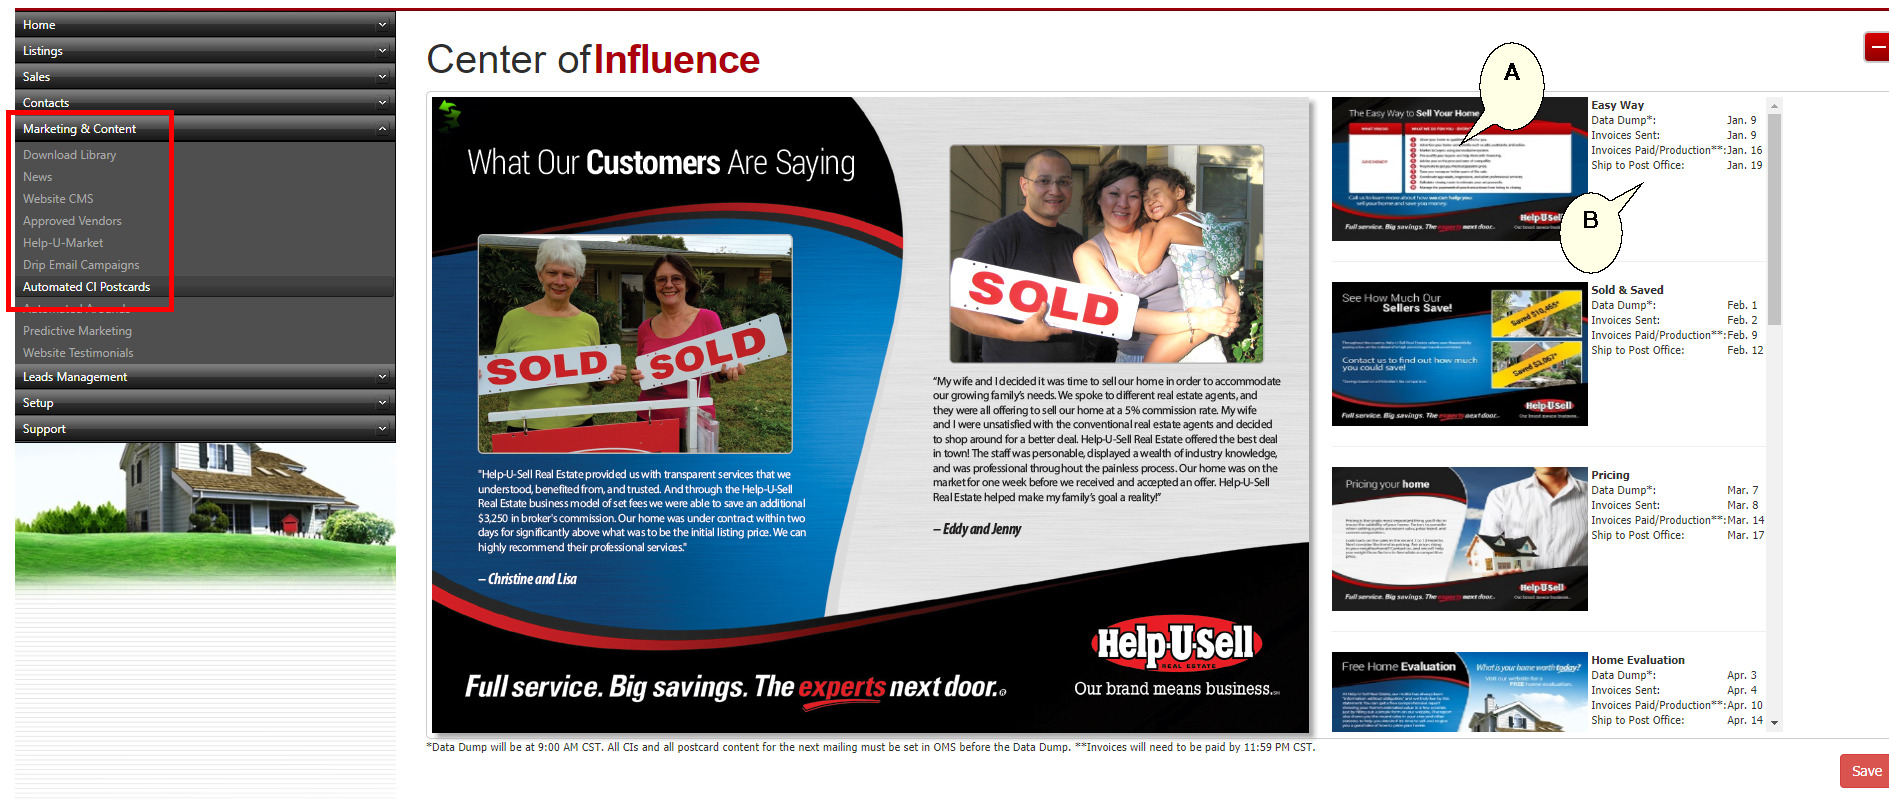
Next go to 'Marketing and Content' on the left Navigation and then select 'Automated CI Postcards'.
-
You will see a list of the 10 cards we send out every year (A). These cards will update and change from one year to the next.
-
On the right side of every card you will see when the Data Dump takes place. The Data Dump happens when the CI contact list and card edits are delivered to the printer, when invoices are mailed to the office, when payment needs to be received and final proofing be completed, and finally the date when the cards are shipped to the post office (B).
Note: You may have to scroll to the right to see the postcard information in number 4 above.
-
-
You have the ability to edit the reverse side of the cards. You do not have to change the reverse for every card, just one and we will use the same content on all cards going out.
If you choose to update or change the reverse side, all future cards will then have the updated information.
-
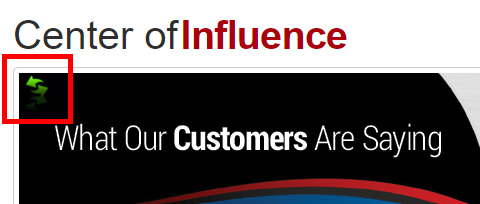
To edit a card, click on the green 'flip' icon towards the top left of the card.
-
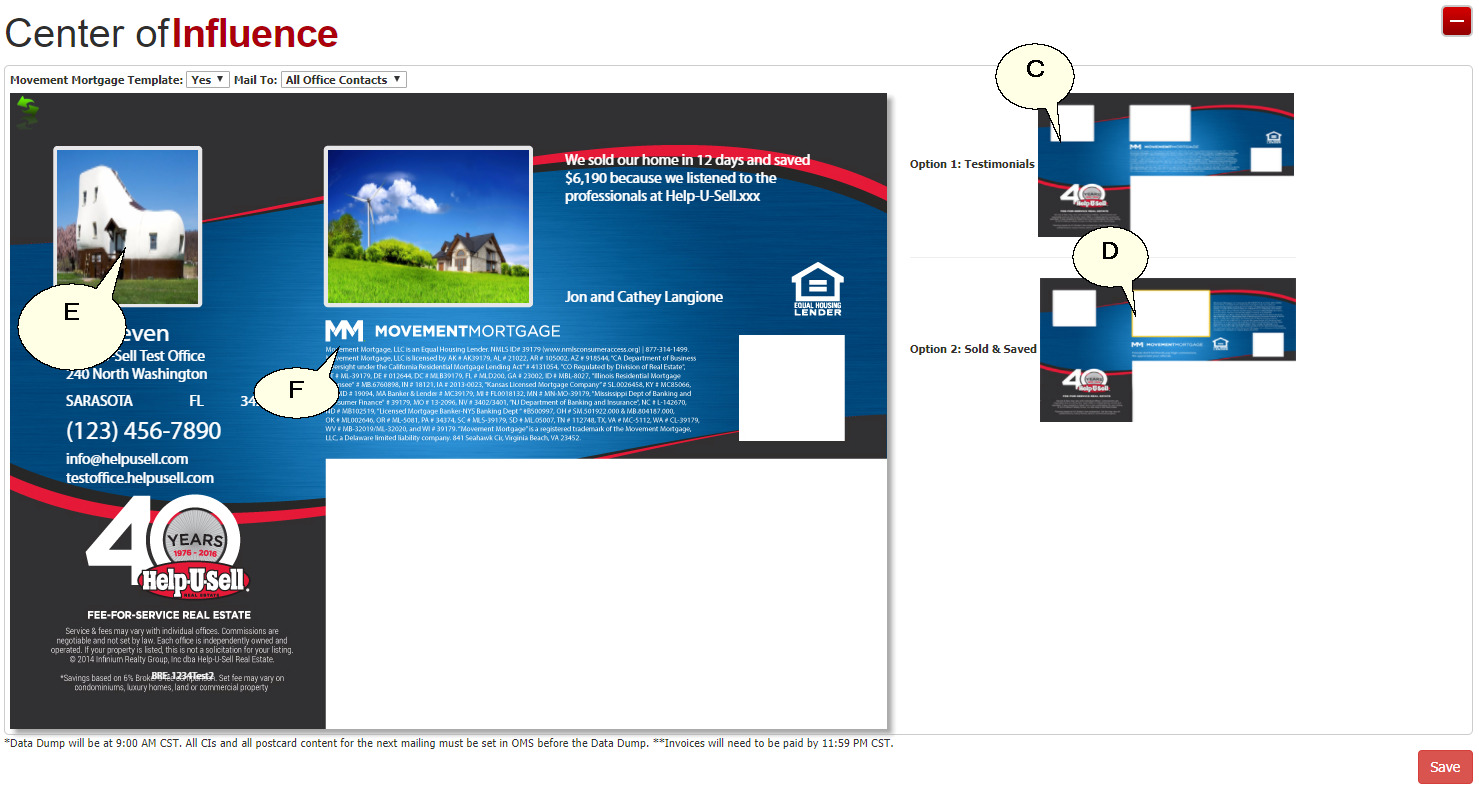
Once the card is flipped, you can choose between a Testimonial Reverse option (C), or a Sold and Saved option (D). For Testimonial options you can upload a testimonial picture and click into the box to the right of the picture to add the testimonial. For the Sold and Saved option we have created several Sold and Save pictures to choose from. You cannot upload your own as the design and text need to be exact for printing on the card. These Sold and Saved homes are real Help-U-Sell Office's homes and savings. You can also update the Agent image or add an Office image (E).
-
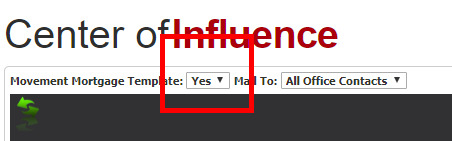
All the Office or Agent information is also editable. If you want to save an additional 15% on the cost of the cards, you can opt in to display the Movement Mortgage logo on the reverse of the card (F). You do not have to do business with Movement Mortgage to take advantage of this offer.
-
Finally, Agent Level cards can only be delivered to the Agents contacts. This option can not be edited on Agent Level Cards.