Adding Neighborhoods
To add neighborhoods to the WordPress templates follow these steps.
For Boulevard 3 Template Click here for Boulevard 4
-
Log in to the WordPress backend - yoursite.helpusell.com/wp-admin
-
Navigate to the SpatialMatch menu item on the left and then choose either 'All Maps' or 'Add New Maps'
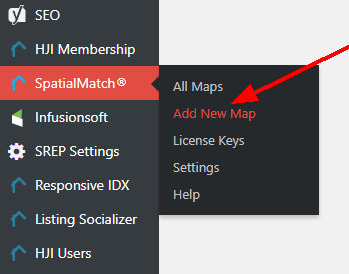
Adding a new Neighborhood
-
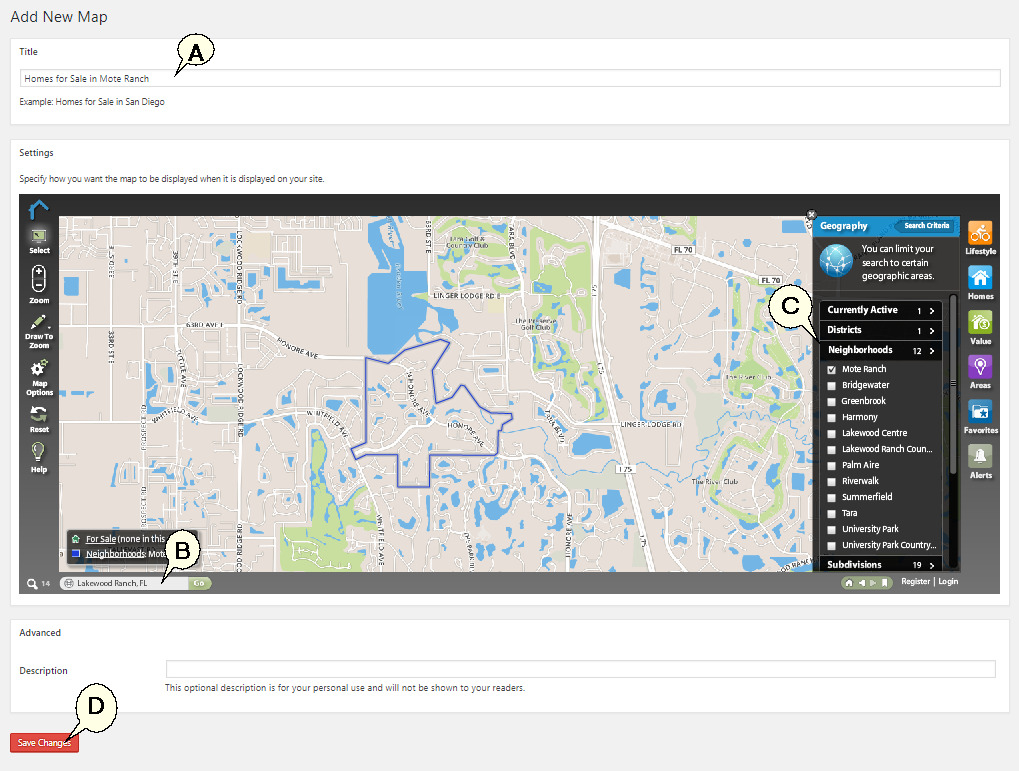
Add the title of the Neighborhood/Map (A). (If Map does not load click here)
-
Search for the neighborbood you want to add in the search box towards to bottom left of the map (B).
-
Narrow down your location by using the filter options on the right of the map (C).
-
Save Changes (D).
-
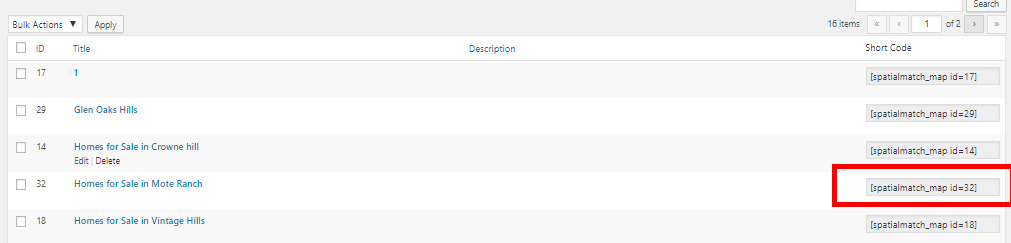
Go to All Maps, and get the 'Map Id' - You will need this later.
-
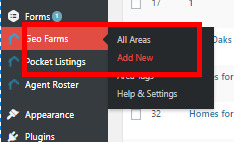
Go to Geo Farms in left navigation menu, click 'Add New'
-
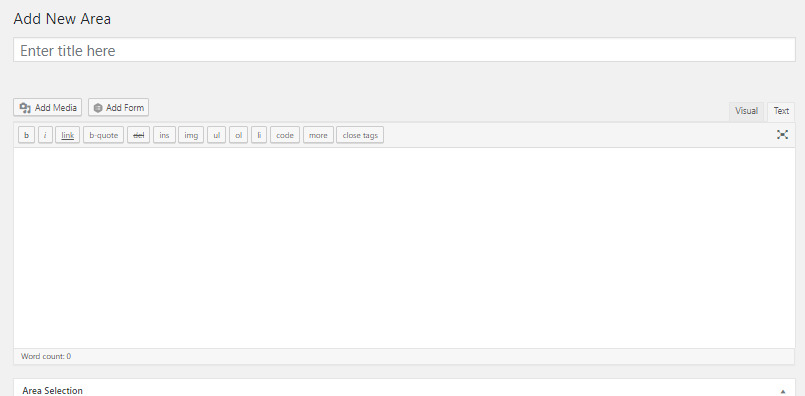
Add a Title for the page. The form below the title allows you to add content such as descriptions, video or pictures.
-
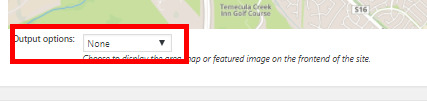
Important: Change the default 'Output Option' from 'Map' to 'None'
-
-
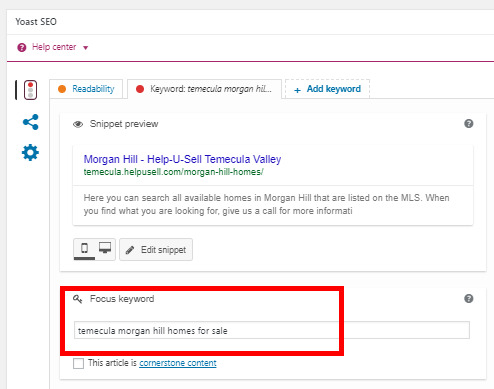
Add some Keywords for the Neighborhood page next
Adding Tabs to the Neighborhood page
-
Leave Tab one empty
-
Add 'Interactive Map Search' for Tab 2 Name
-
Tab 2 Shortcode is where the Map Id you copied in step 7 above will be used.
[spatialmatch_map id=15 width=100% height=650]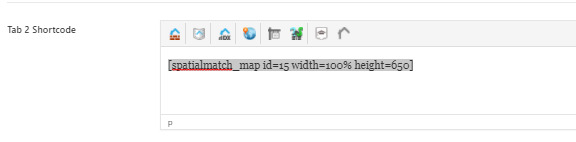
-
Tab 3 Name is 'Lifestyle Information'
-
For Tab 3 Shortcode please contact Help-U-Sell Support to get this code. An example of the code is:
[lifestyle_finder bookmark="/areas/migrate?where=86ab7cfd4927e7442177dce5572a6d26" width="100%" height="1145px"]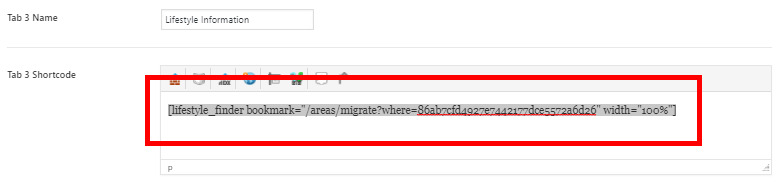
NOTE: The lifestyle code can be obtained either by using the http://finder.homejunction.com/areas/overview site. If access denied then you can also use http://oms.helpusell.com/utilities/HJ-lifestyleLookup.aspx
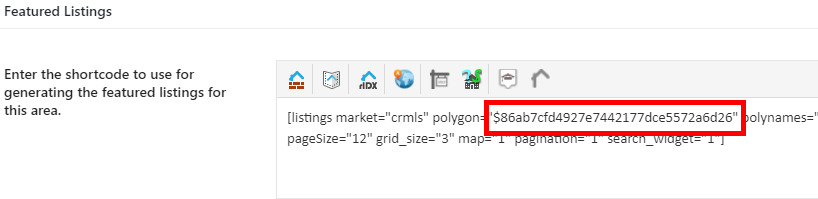
Another method is using the rIDX tool as with step 11.11 below and copying/replacing the 'polygon=' key into the 'where=' location after the location area has been selected.
-
Tab 4 Name is 'Recent Sales'
-
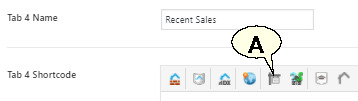
For the Tab 4 Shortcode click on the HJI Recent Sales Icon (A).
-
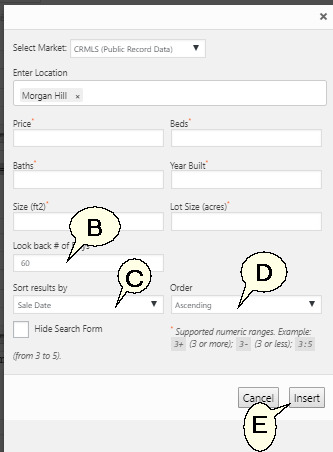
Start Typing the Neighborhood/Location and select from the drop down. You can also add other filters such as Price, Beds or Bath. To change the default look back days of 60, adjust the value in the 'Look back # of Days' field (B). We recommend a 90 day window. Also sort by 'Sale Date' (C) and Order by 'Ascending' (D).
-
Click 'Insert' (E).

-
Tabs 5 and 6 are optional tabs that can be added. They include School Information and New Construction. As with the Recent Sales, click on the relevant icons for School (F) or New Construction (G) to insert the short code.
Remember to complete the Tab Name fields.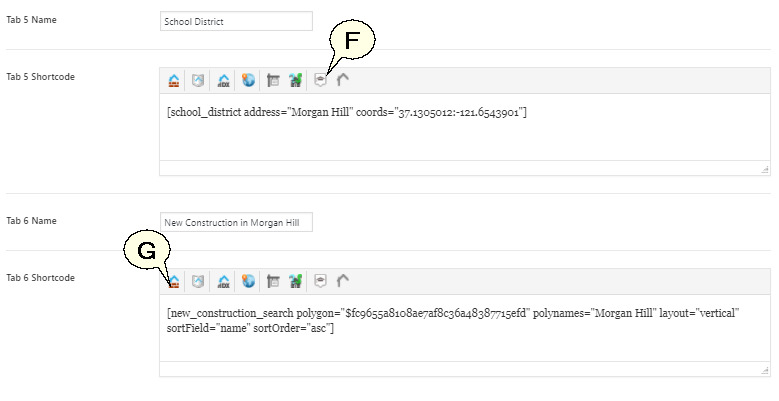
-
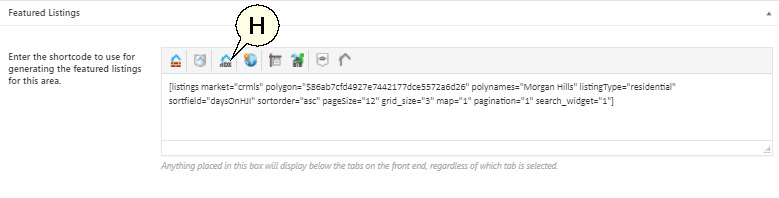
Finally go to the Featured Listings section towards the bottom of the page.
To setup an IDX search for this neighborhood click on the 'rIDX' icon in the Featured Listings section (H).
-
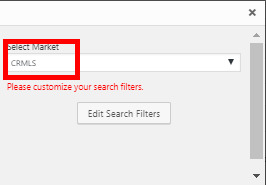
Select your MLS and click on 'Edit Search Filters'.
-
Select the criteria for the IDX search Results to display on this neighborhood page. Make sure the 'Widget Display Settings' are setup like this, and click 'Insert'.

-
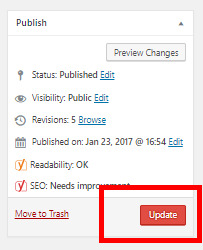
Now click the 'Update' button on the top right of the page so we can save the page and continue to adding to to the menu of your website.
Adding Neighborhood Pages to the Menu
-
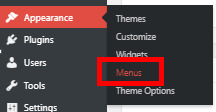
Go to Appearance and then the Menus item:
-
In 'Menus' go to 'Manage with Live Preview'. Then click on 'Menu' and 'Main Menu'.

-
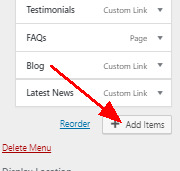
Go to the bottom left of the page and click on 'Add Items'
-
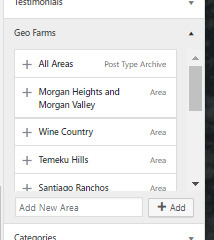
Go to 'Geo Farms', click the arrow. This will list all the Geo Farm already created for the office. Click the '+' icon in front of the neighborhood(s) you want to add.
-
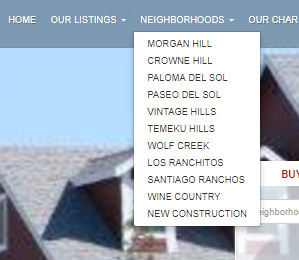
This area will now be in the main menu hierarchy on the left. Drag and drop the Neighborhood under the Neighborhoods menu in the order you want. Click the 'Save' button when you are happy with the menu placement.
-
Click 'Save & Publish' and reload the website to ensure it is placed correctly.
Please contact Help-U-Sell Real Estate Support if you need any other assistance at support@helpusell.com
For Boulevard 4 Templates
-
Log in to the WordPress backend - yoursite.helpusell.com/wp-admin
-
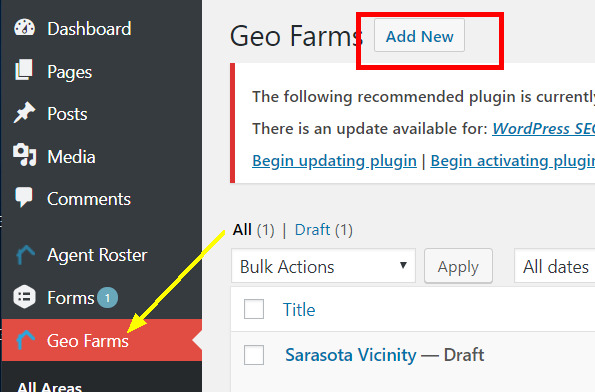
Navigate to Geofarms in left navigation screen and click on 'Add New'
-
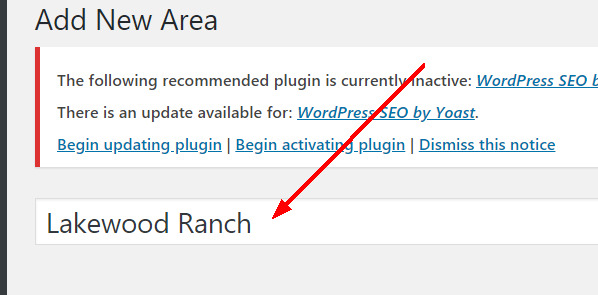
Enter the title for the new neighborhood and scroll down to 'Area Selection'
-
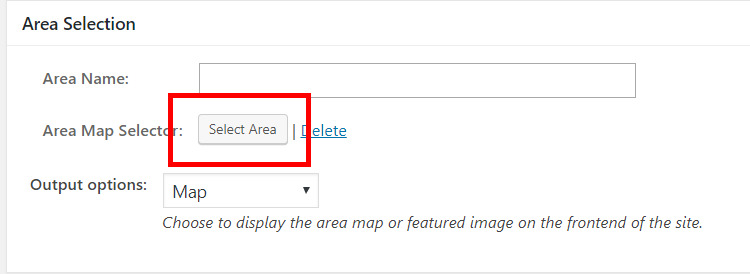
In 'Area Selection' click on the 'Select Area' button
-
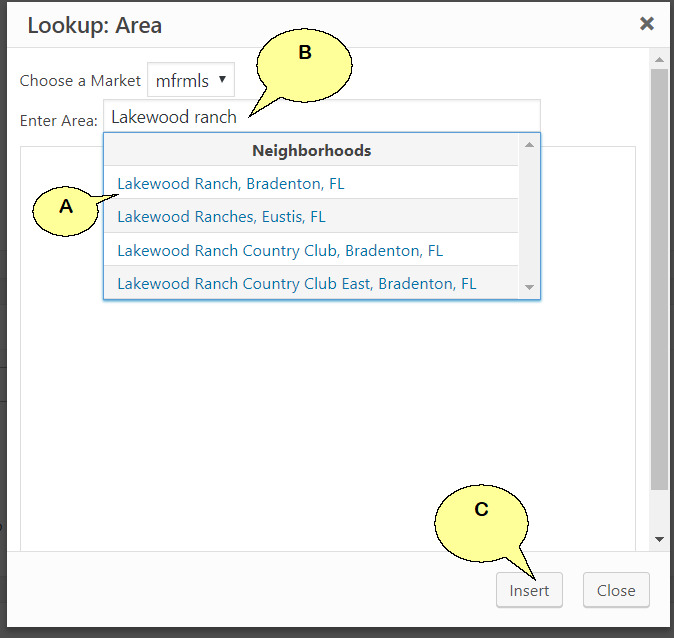
Based on the area title you entered in step 3 above the system will pull the closest matches (A). Select the neighborhood from the list. If your neighborhood is not populating in the list, you can try and re-enter it in the 'Enter Area' field (B). Click the 'Insert' button (C).
-
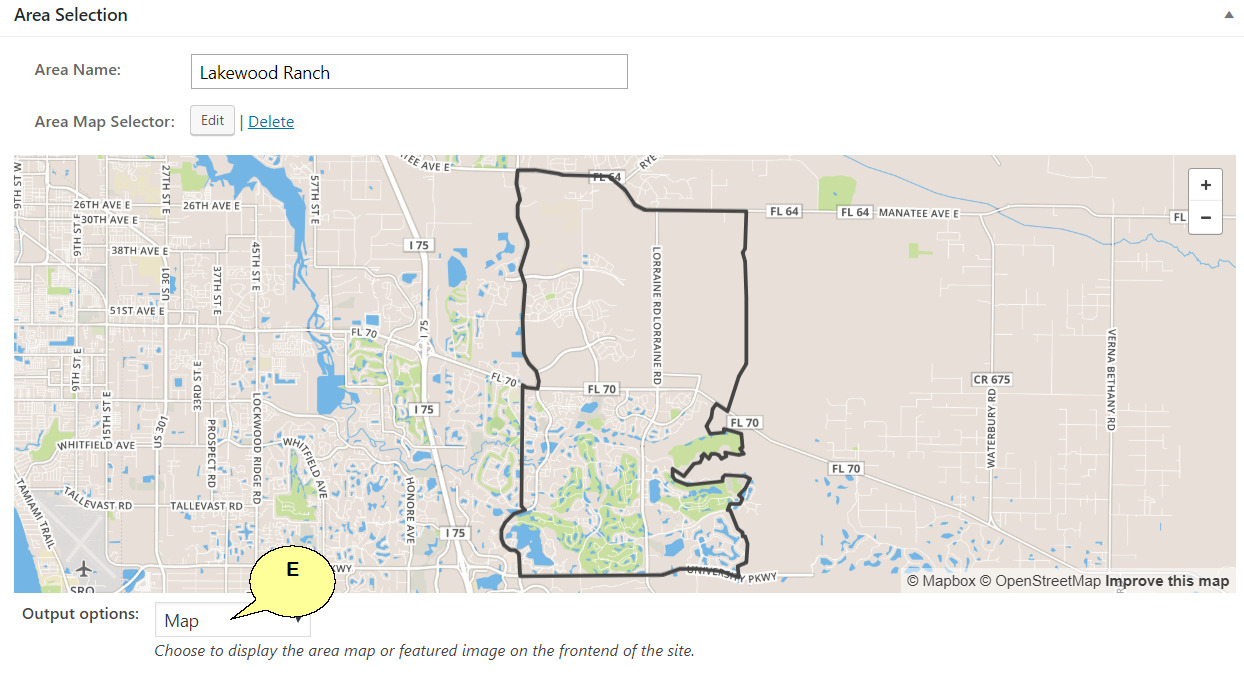
Once added, you will see the boundary map of the neighborhood. In the 'Output Options' section (E), you can select to display the map, a featured image or none.
-
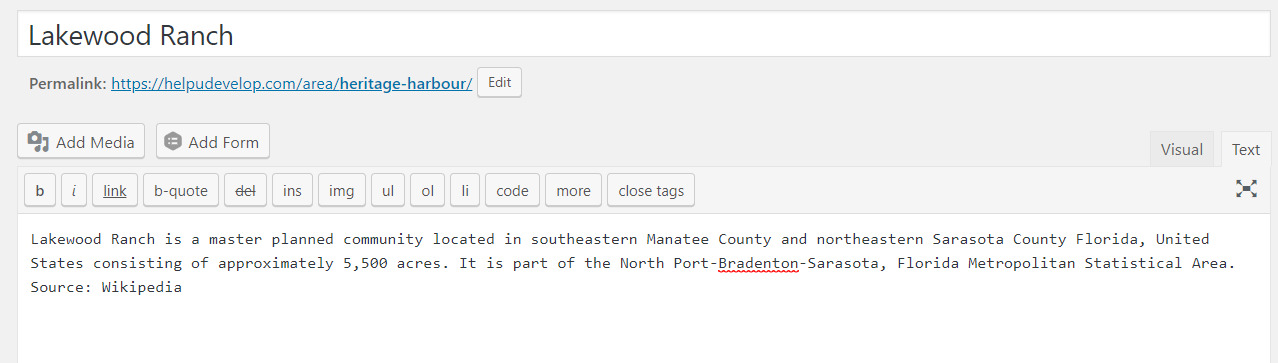
We encourage you to add a description of the area. If you copy from Wikipedia for example, please remember to site your sources.
-
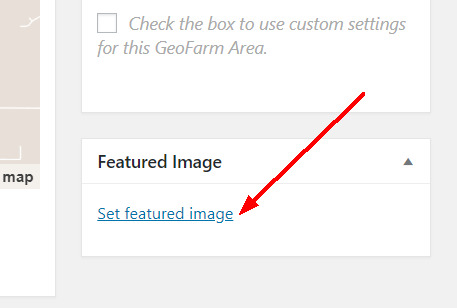
Finally in order to display the location on the Area's page you will need to add a featured image. Towards the right column at the very bottom click on the 'set featured image' link.
-
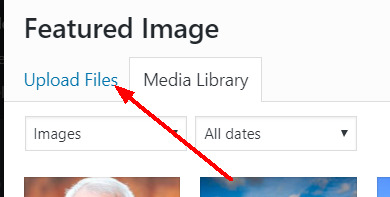
If the image you want to use is not in your library yet, click on the 'Upload Files' tab
-
Click 'the 'Select Image' bottom and select the image from your computer, we recommended naming the image relevant to the neighborhood it will be used for.
-
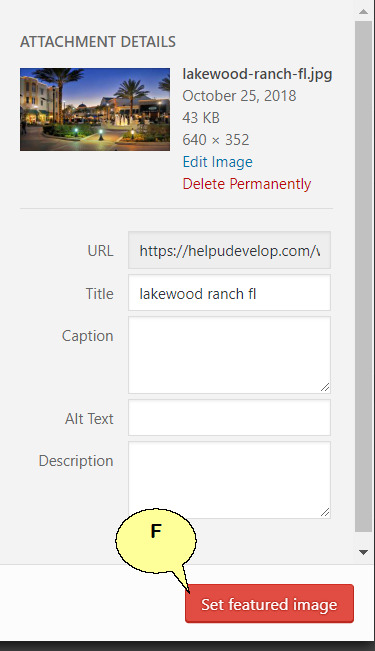
Once the image uploads, it will display on the right side of the Featured Image window. You can delete the image or edit the image. We recommended adding a caption and description to the image for added SEO advantages. Click the 'Set Featured Image' button (F) to set the image for this neighborhood.
-
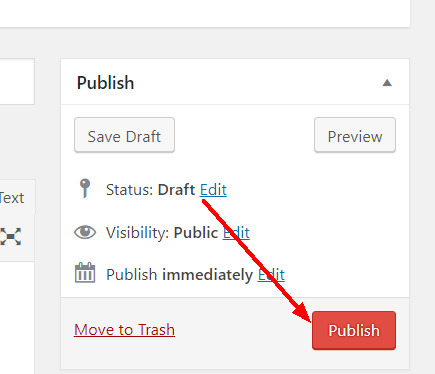
To publish your neighborhood page, click 'Publish' in the top right section of the window.
The page will automatically be added to the Areas section of your website located at: 'https://helpudevelop.com/areas/' )
Note: replace 'helpudevelop' in the url with your website address.
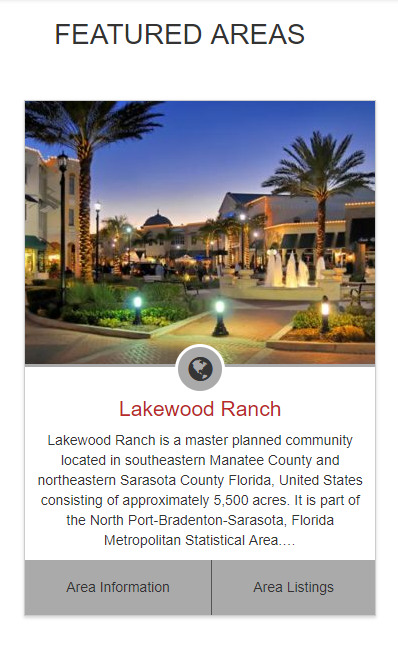
Area information and listings are automatically created and includes demographics, school and active and past listing information.
You should also add the new neighborhood to your menu. Please contact us for help on adding new menu items.